Essential Steps for Air Conditioning Installation
- Jenny Arroyo
- Feb 9
- 4 min read

Installing an air conditioning system requires careful planning and precise execution. Proper installation ensures efficient cooling, energy savings, and long-term reliability. This guide outlines the essential steps for air conditioning installation. It provides clear, actionable information for homeowners, property managers, and commercial businesses seeking to install or upgrade their cooling systems.
Understanding the Air Conditioning Installation Process
The air conditioning installation process begins with assessing the property’s cooling needs. This step is critical to select the right system size and type. An undersized unit will struggle to cool the space, while an oversized unit wastes energy and increases costs.
A professional technician performs a load calculation using industry standards such as Manual J. This calculation considers factors like square footage, insulation, window placement, and local climate conditions. After determining the cooling load, the technician recommends an appropriate air conditioning unit.
Next, the installation site is prepared. This includes selecting a location for the outdoor condenser unit and indoor air handler or evaporator coil. The site must allow for proper airflow, easy access for maintenance, and compliance with local building codes.
The installation team then mounts the indoor and outdoor units. They connect refrigerant lines, electrical wiring, and drainage systems. Proper sealing and insulation of refrigerant lines prevent energy loss and system inefficiency.
Finally, the system undergoes testing and calibration. The technician checks refrigerant levels, airflow, and thermostat operation. This ensures the system runs smoothly and meets performance specifications.

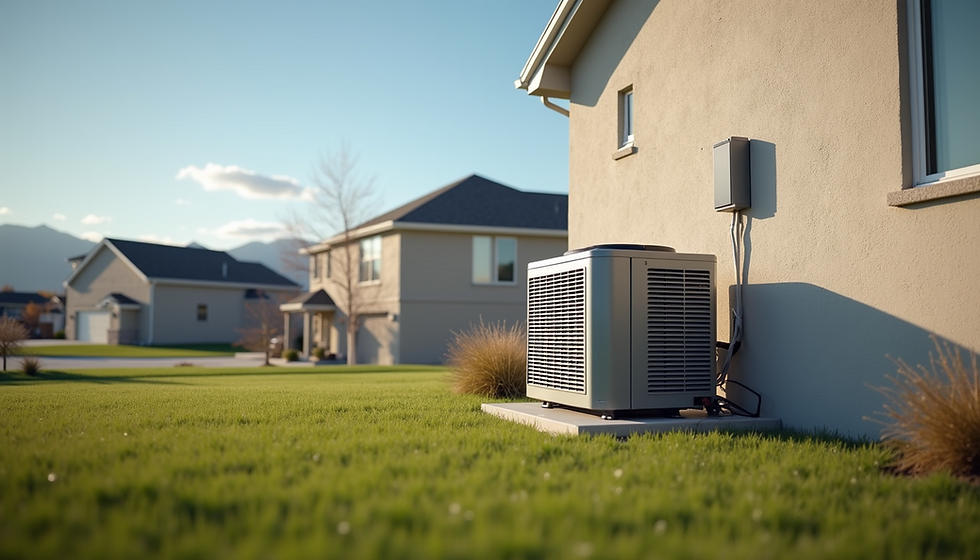
Outdoor condenser unit installed with proper clearance
Key Considerations for Air Conditioning Installation
Several factors influence the success of air conditioning installation. These considerations help avoid common pitfalls and ensure optimal system performance.
System Type and Efficiency
Choose between central air conditioning, ductless mini-splits, or packaged units based on the building layout and cooling requirements. Look for units with high Seasonal Energy Efficiency Ratio (SEER) ratings to reduce energy consumption.
Ductwork Condition
Inspect existing ductwork for leaks, blockages, or damage. Poor ductwork reduces cooling efficiency and increases energy costs. Repair or replace ducts as needed before installation.
Electrical Capacity
Verify that the electrical system can support the new air conditioning unit. Upgrading the electrical panel or circuit breakers may be necessary to handle the load safely.
Permits and Codes
Obtain all required permits and ensure the installation complies with local building codes and safety regulations. This step prevents legal issues and ensures system safety.
Financing Options
Consider financing plans to make the installation more affordable. Many HVAC providers offer flexible payment options to help manage upfront costs.
These considerations form the foundation of a successful air conditioning installation project.
How much should an AC unit cost to install?
The cost of installing an air conditioning unit varies widely depending on several factors. These include the type and size of the system, complexity of the installation, and regional labor rates.
On average, installing a central air conditioning system ranges from $3,000 to $7,000. This estimate includes the unit, labor, ductwork modifications, and permits. Ductless mini-split systems typically cost between $2,000 and $5,000 per zone.
Additional expenses may arise if electrical upgrades or structural modifications are required. For example, upgrading the electrical panel can add $500 to $1,500 to the total cost.
It is important to obtain multiple quotes from licensed HVAC contractors. Compare the scope of work, warranties, and customer reviews before making a decision.
Investing in a high-efficiency system may have a higher upfront cost but results in lower energy bills and longer equipment life. Always prioritize quality and professional installation over the lowest price.
Step-by-Step Air Conditioning Installation Guide
This section outlines the detailed steps involved in installing an air conditioning system.
Site Inspection and Load Calculation
Conduct a thorough inspection of the property. Measure the space and evaluate insulation, windows, and shading. Perform a load calculation to determine the required cooling capacity.
System Selection
Choose the appropriate air conditioning system based on the load calculation and building layout. Select a unit with a suitable SEER rating and features.
Prepare Installation Area
Clear the installation site for the outdoor condenser and indoor air handler. Ensure proper clearance for airflow and maintenance access.
Install Indoor Unit
Mount the air handler or evaporator coil inside the building. Connect refrigerant lines and drain pipes. Seal all connections to prevent leaks.
Install Outdoor Unit
Position the condenser unit on a stable, level surface. Connect refrigerant lines and electrical wiring. Follow manufacturer guidelines for spacing and clearance.
Electrical Connections
Connect the system to the electrical panel. Install disconnect switches and circuit breakers as required. Verify that wiring meets local codes.
System Charging and Testing
Evacuate air and moisture from refrigerant lines. Charge the system with the correct refrigerant amount. Test the system for leaks, airflow, and thermostat operation.
Final Inspection and Cleanup
Inspect all components for proper installation. Clean the work area and remove debris. Provide the customer with system operation instructions and maintenance tips.
Following these steps ensures a safe, efficient, and reliable air conditioning installation.

Technician connecting refrigerant lines to indoor air handler
Maintenance Tips After Air Conditioning Installation
Proper maintenance extends the life of the air conditioning system and maintains its efficiency. After installation, follow these maintenance tips:
Change Air Filters Regularly
Replace filters every 1 to 3 months to maintain airflow and indoor air quality.
Clean Condenser Coils
Remove dirt and debris from the outdoor unit to improve heat exchange.
Inspect Ductwork
Check for leaks or damage and seal any gaps to prevent energy loss.
Schedule Professional Tune-Ups
Arrange annual inspections and servicing by a licensed HVAC technician.
Monitor Thermostat Settings
Use programmable thermostats to optimize cooling schedules and reduce energy use.
Adhering to these practices helps keep the system running efficiently and reduces the risk of breakdowns.
Choosing the Right HVAC Provider
Selecting a reliable HVAC provider is crucial for a successful air conditioning installation. Look for companies with:
Licensed and Experienced Technicians
Ensure the team has proper certifications and training.
Positive Customer Reviews
Check testimonials and ratings to gauge service quality.
Comprehensive Warranties
Choose providers offering warranties on equipment and labor.
Transparent Pricing
Obtain detailed quotes with no hidden fees.
Financing Options
Consider providers that offer flexible payment plans to ease upfront costs.
For those seeking professional assistance, air conditioning installation salt lake city offers expert services tailored to residential and commercial needs. Their team prioritizes quality workmanship and customer satisfaction.
By following these essential steps and recommendations, the air conditioning installation process becomes straightforward and effective. Proper planning, professional execution, and ongoing maintenance ensure a comfortable indoor environment year-round.

Comments